
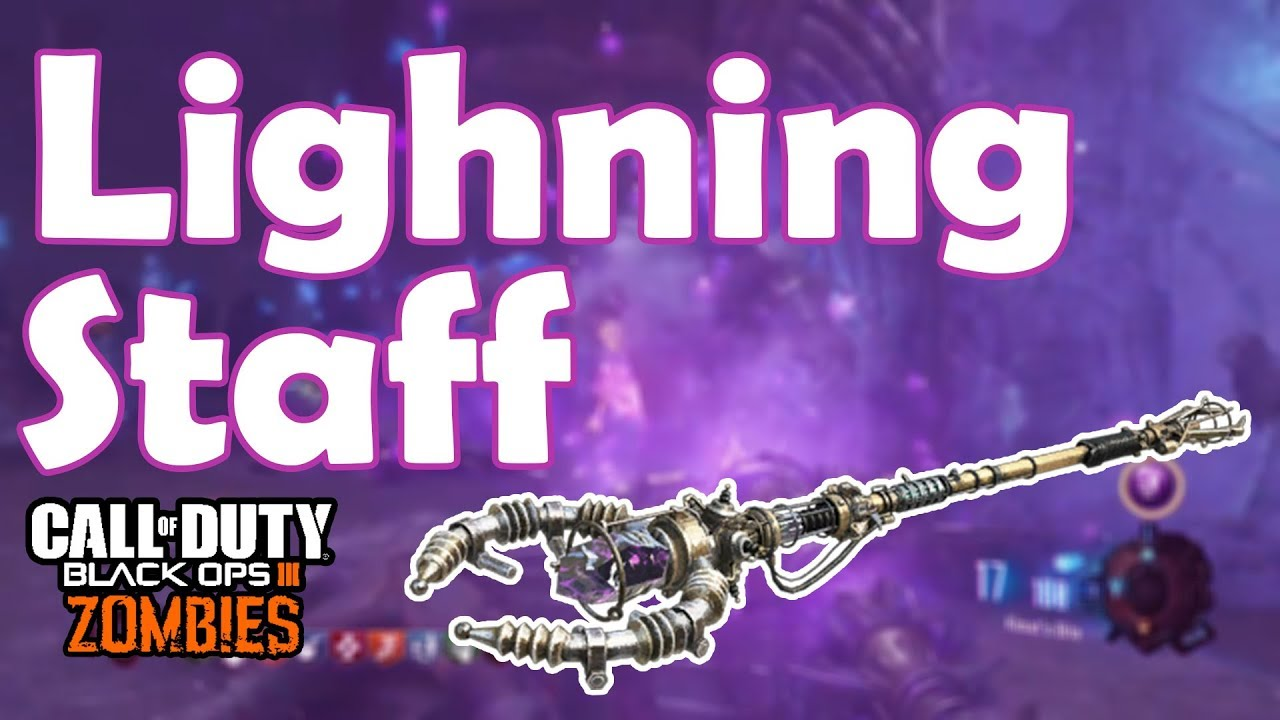
In the thrilling world of Black Ops 3 Zombies, the Lightning Staff stands as a coveted weapon, unleashing devastating electrical power upon the undead hordes. However, acquiring this staff is just the first step. To unlock its true potential, you’ll need to embark on a thrilling upgrade quest, harnessing the power of the elements.
This comprehensive guide delves into the process of upgrading the Lightning Staff in Black Ops 3 Zombies, equipping you with the knowledge and strategies to dominate the battlefield.
Unveiling the Upgraded Lightning Staff: Enhanced Power Awaits
Upgrading the Lightning Staff grants it a significant boost in power. Here’s what you can expect:
Increased Damage: The upgraded staff delivers a more potent electrical blast, decimating zombies with greater efficiency.
Charged Shot: Hold down the fire button to unleash a powerful charged shot, capable of wiping out entire groups of zombies with a single, electrifying blast.
Improved Functionality: The upgraded staff gains additional functionality, such as destroying certain environmental objects or activating mechanisms crucial for progression.
By completing the upgrade, you transform the Lightning Staff from a decent weapon to a true game-changer, significantly boosting your chances of survival in the face of the relentless zombie onslaught.
The Path to Power: A Multi-Step Upgrade Process
Upgrading the Lightning Staff is not a simple task. It requires completing a series of intricate steps scattered across the map “Origins.” Here’s a detailed breakdown of the upgrade process:
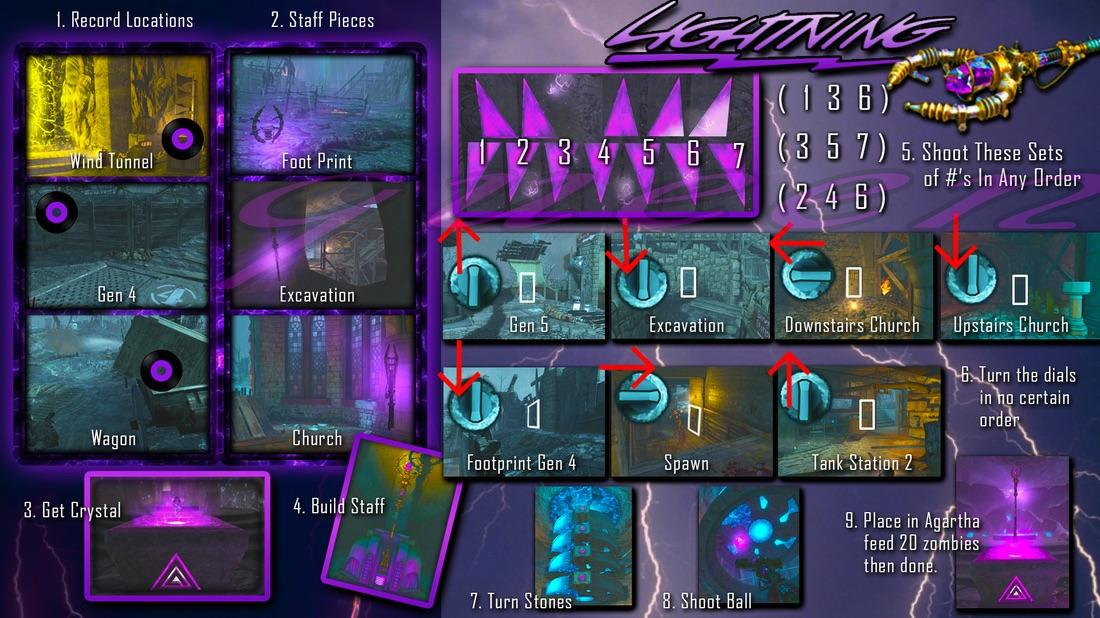
1. Building the Lightning Staff:
Locate the three staff parts scattered across the map: disc fragment near Juggernog, gramophone near Pack-a-Punch machine (requires power to access the tunnel), and the final part on a tank path accessible by jumping off the tank as it approaches the church.
Once you have all three parts, head to the Excavation Site and interact with the pedestal beneath the glowing orb.
2. The Crazy Place Sequence:
Return to the Lightning Tunnel near Generator 5 and place the gramophone on the pedestal.
Enter the Crazy Place through the purple portal.
Locate the purple crystal within the Crazy Place and pick it up.
3. Dialing in the Power:
Locate the seven electrical panels scattered across the map, each with a dial that can be rotated. Here’s their location breakdown:
Generator 5 (facing down)
Mountain wall near Pack-a-Punch (facing up)
Downstairs Church (facing right)
Upstairs Church (facing up)
Generator 4 (facing up)
Spawn area (facing left)
Tank Station (facing down)
Rotate each dial until the light beside it turns purple, indicating that the panel is correctly configured. There’s no specific order to adjust the dials, so rotate them one by one until all lights turn purple.
4. Staff Activation and Soul Charge:
Return to the Excavation Site and interact with the glowing orb beneath the staff pedestal.
The Lightning Staff will fly up and activate. Head back to the Crazy Place through the portal.
Place the upgraded staff on the pedestal within the Crazy Place.
Eliminate zombies within the Crazy Place to charge the staff. You’ll see a visual cue on your HUD once the staff is fully charged.
Congratulations! You’ve successfully upgraded your Lightning Staff, unleashing its full potential to unleash a storm of electrical fury upon the undead.
Tips and Strategies for a Smoother Upgrade Process:
Prioritize Power: Ensure you have power turned on to access the tunnel leading to the gramophone location.
Teamwork Makes the Dream Work: Upgrading the staff can be challenging solo. Consider teaming up with fellow players to cover each other and eliminate threats.
Prioritize Communication: If playing with a team, communicate effectively to identify staff parts, dial locations, and coordinate defense during the Crazy Place sequence.
Utilize Teleporters: Teleport pads located strategically around the map can significantly reduce travel time during the upgrade process.
Pack-a-Punch for Defense: Consider upgrading your weapons at the Pack-a-Punch machine before embarking on the upgrade quest. This will enhance your firepower and make handling zombie hordes during the process easier.
By following this guide, utilizing these tips, and strategically utilizing teamwork and communication, you’ll be well on your way to unlocking the upgraded Lightning Staff’s devastating power.
Beyond the Basics: Advanced Techniques for Mastering the Upgraded Staff
Once you’ve upgraded the Lightning Staff, mastering its usage becomes crucial. Here are some sophisticated methods to improve your abilities:
Charged Shot Mastery: The charged shot offers immense destructive power. Practice aiming and timing your charged shots to maximize their effectiveness. Remember, a well-placed charged shot can clear out large groups of zombies, creating crucial breathing room.
Staff Combos: The upgraded Lightning Staff can be combined with other staffs to unlock devastating elemental effects. For example, combining the Lightning Staff with the Fire Staff creates a powerful explosion that can instantly eliminate entire waves of zombies. Experiment with different staff combinations to discover their unique effects.
Strategic Staff Usage: Don’t rely solely on the staff’s power. Utilize other weapons and equipment strategically. The staff is best used for crowd control and eliminating large groups at once, while other weapons might be more efficient for single targets or tight corners.
Staff Conservation: The staff’s charged shot consumes a significant amount of energy. Use it strategically and avoid wasting shots on lone zombies. Focus on eliminating large groups or breaching through tough waves to maximize its effectiveness.
By mastering these advanced techniques, you’ll transform from a basic Lightning Staff user to a true master of the elements, dominating the battlefield and turning the tide against the relentless zombie hordes in Black Ops 3 Zombies.
The Legacy of the Upgraded Lightning Staff: A Powerful Ally
The upgraded Lightning Staff stands as a testament to the depth and complexity of Black Ops 3 Zombies. Its intricate upgrade process rewards dedicated players, while its immense power provides a satisfying and effective tool for survival.
Whether you’re a seasoned veteran or a newcomer to the thrilling world of Black Ops 3 Zombies, the upgraded Lightning Staff offers a unique and powerful experience that can elevate your gameplay and enhance your journey through the undead apocalypse.
So, grab your tools, embark on the upgrade quest, and unleash the storm. With the upgraded Lightning Staff in your hand, you’ll be a force to be reckoned with in the fight against the never-ending waves of the undead.
FAQs
The Lightning Staff in Call of Duty: Black Ops III Zombies (Chronicles) is a powerhouse weapon, and upgrading it unlocks its true potential. This FAQ tackles everything you need to know about this electrifying process.
What are the benefits of upgrading the Lightning Staff?
Upgrading the Lightning Staff grants several advantages:
Increased damage: It packs a serious punch, taking down zombies much faster.
Chain lightning: Your shots can chain to multiple enemies, clearing hordes efficiently.
Alternate firing mode: You gain a powerful charged shot that explodes on impact.
How do I upgrade the Lightning Staff?
Upgrading involves a series of steps across the map Origins:
Collect the Parts: Locate the three Lightning Staff parts scattered around the map. Look for glowing purple pedestals and interact with them.
Activate the Crazy Place: Head down to the Excavation Site and use the gramophone near the Pack-a-Punch machine.
Sequence the Crazy Place Teleporters: Shoot the glowing triangles on the teleporters in a specific order (1-3-6, 3-5-7, 2-4-6). You’ll hear a confirmation sound.
Dial It In: Find and adjust seven dials around the map to a specific position (consult a guide for their locations and settings). A giant beam of light will shoot up when all dials are correct.
Charge the Staff: Return to the Crazy Place and place the upgraded staff in the pedestal. Kill zombies with any weapon to charge it.
Where can I find a guide for the upgrade process?
Many resources detail the upgrade process visually:
YouTube Videos: Search for “Upgrading the Lightning Staff in Origins BO3” on YouTube. Look for tutorials with clear visuals and explanations.
Online Guides: Websites like https://steamcommunity.com/sharedfiles/filedetails/?id=2745570343 offer step-by-step guides with screenshots and detailed instructions.
What are some tips for successfully upgrading the Lightning Staff?
Work with a team: Having teammates distract zombies can be helpful during the charging stage in the Crazy Place.
Memorize the steps: Familiarize yourself with the part locations, sequence order, and dial positions beforehand.
Take your time: Don’t rush the process. Focus on completing each step accurately.
Pack-a-Punch before charging: Upgrade your other weapons before charging the staff in the Crazy Place for added firepower.
Once I upgrade the staff, is there anything else to know?
The upgraded Lightning Staff remains a powerful tool throughout the game. Practice using its alternate firing mode and chaining lightning to maximize its effectiveness.
Remember: Upgrading the Lightning Staff is a rewarding experience, granting you a potent weapon for the zombie apocalypse. With a little preparation and teamwork, you’ll be wielding this electric marvel in no time!
To read more, Click Here.